This post will walk you through using Tenable’s Nessus to perform a credentialed patch audit and compliance scan.
This activity may be part of a build review, that assesses a system’s base configuration in order to identify weaknesses in the source build it was created from, or maybe even as part of a compliance audit, like PCI DSS requirement 2.2, where a system’s configuration can be assessed against known baselines, for example the Centre for Internet Security’s (CIS) Windows Server 2012 R2 benchmark.
Whatever the requirement, an authenticated scan using administrative credentials can provide detailed insight into the security posture of an asset when compared against a baseline. We’re going to provide a run through of how to carry out an authenticated scan to ascertain the patch levels of a desktop operating system, followed by a compliance audit scan of a server, both of which Nessus has in-built templates for.

Nessus Professional v6.8.1 is being used for both scans. We’re going to test the patch levels of a Windows 10 evaluation build installation, followed by a CIS Windows 2012 R2 compliance audit scan.
Credentialed Patch Audit
The amount of info the patch audit reveals will depend on the privileges it runs with, so in order to obtain as much data as possible we’re going to use a local admin account.
After selecting the scan, enter a scan name and the target IP address as per a normal scan. Then in the scan library click Credentials, followed by Windows or SSH (SSH will most likely be used if you’re testing the patch levels on a *nix system). Nessus supports several authentication types, further reading on which can be found here, however we’re going to use a good old fashioned username and password so we click Windows and add the credentials for our account.
There will be two unchecked tick boxes at the bottom, Start the Remote Registry service during the scan and Enable administrative shares during the scan which will need to be ticked, as depicted below. These will enable the remote registry service and admin shares (if disabled), allowing Nessus to scan more thoroughly and provide better results. To be accurate, admin shares need to be enabled on the target machine instead of here, but more on this later.
Windows in-built firewall may also block connections so ensure that this is turned off (or appropriate rules added) for the duration of the scan to avoid any problems.

Now regardless of whether the two boxes were ticked or not, it’s very possible that server side policy prohibits the enabling of the remote registry service and/or administrative shares. With admin privileges Nessus is able to remotely enable and subsequently disable the remote registry service (assuming it’s enabled but not running) however, if administrative shares are disabled by policy, Nessus will not produce good results as we’ll soon see.
Just to confuse matters further, if admin shares and remote registry are already enabled on the target and the boxes are not ticked in Nessus, it will still scan the admin shares and registry, so these boxes are just to tell Nessus to attempt them if it finds they’re disabled. Quick guides on how to enable both the remote registry and admin shares are outlined below, and make sure a privileged account is making the changes. If however you know for a fact that policy doesn’t disable these features, skip straight to the Results section further down.
Enabling Administrative Shares
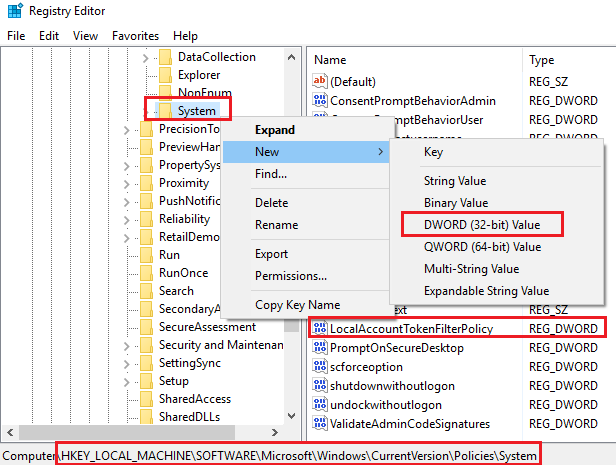
We need to add a registry value. Navigate to HKEY_LOCAL_MACHINE\SOFTWARE\Microsoft\Windows\CurrentVersion\Policies\System, then right click on System*,* click on New and then choose DWORD (32-bit) Value. Rename the new value LocalAccountTokenFilterPolicy then right-clickand Modify changing the Value from 0 to 1. That’s it, you’re done. The screenshot below depicts the registry key that’s created.
Enabling Remote Registry
Open the system Services, find Remote Registry, change the startup type to Manual, then Start the service, as per the screenshot below.

Results
In our demo an evaluation build of Windows 10 was used and we’ve provided several tests to show how altering these settings affected the outcome. Please note that our Windows test box did not have any policies set, however we’ve noted in each test where admin shares and the remote registry service have been enabled/disabled.
Admin shares enabled in registry
Remote registry service enabled
Both boxes ticked in Nessus
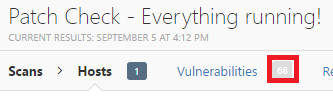
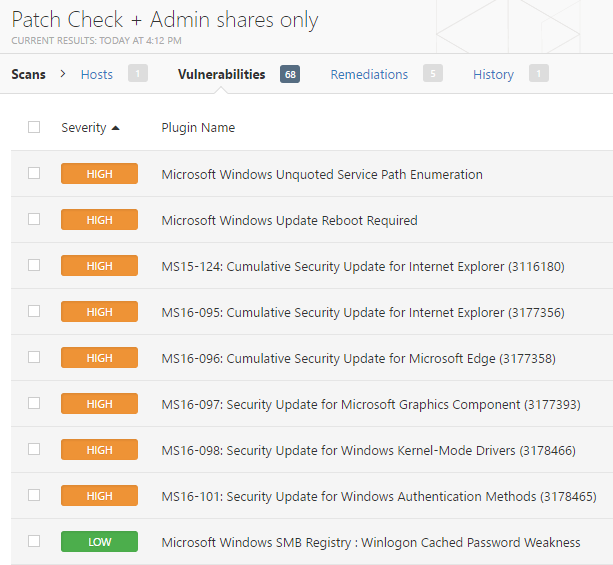
A total of 68 issues ones. Not bad. Next up…
Admin shares enabled in registry
Remote registry service running
Both boxes not ticked in Nessus
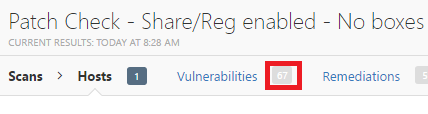
67 issues. The single informational issue missing (but present in the first scan) was “SMB Registry : Stop the Registry Service after the scan (WMI)”. This is expected as in the first test Nessus had to start and stop the remote registry service and to return the system to its original state. This time the service was already running so Nessus left the system as it was. If the registry service had been enabled but not running we would have replicated the results of the first test, thereby showing that leaving the Nessus boxes not ticked will still scan the shares and registry.
The next scan used the following options.
Admin shares disabled in registry
Remote registry service running
Both boxes ticked in Nessus
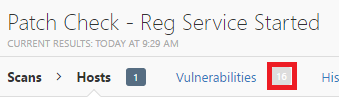
16 issues. Hmm, seems like having admin shares enabled really helped identify things! Now the same scan with nothing enabled and without either box ticked in Nessus, or the “Fire and forget without checking” scan. :)
Admin shares disabled in registry
Remote registry service disabled
Both boxes not ticked in Nessus

Down to 12. Not a great deal less, but fewer nonetheless. So the take away from a credentialed patch audit? Ensure the target box (if Windows) has admin shares enabled and even though the Nessus tick boxes are not always required (when admin shares and remote reg are enabled) I’d leave them ticked anyway to cover all bases so consider saving a modified Nessus template with them ticked.
For reference, some examples of the types of issues you can expect to identify from this type of scan can be found below.
Policy Compliance Auditing Scan
Now we’ll run through a compliance audit scan for Windows 2012 R2 server using a CIS benchmark. After selecting the Policy Compliance Auditing scan and entering a scan name and a target, go to the Credentials tab as with our first scan above and populate the fields with the relevant administrative credentials.
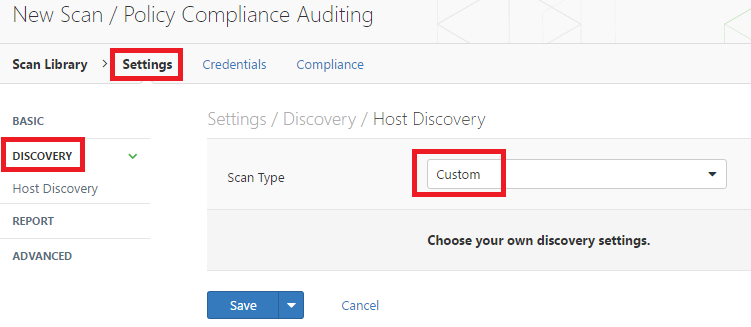
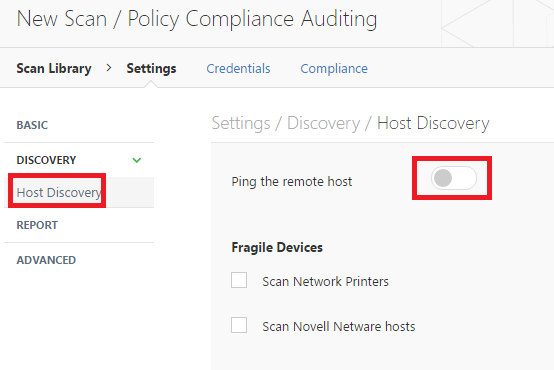
Here we had to carry out an extra step to allow Nessus to connect. Whilst still on the Settings screen click on Discovery from the left column and change the scan type to Custom. Selecting this will populate a new option under Discovery which is Host Discovery. Click that and finally un-check the Ping the remote host option. These steps are shown in the following screenshots.
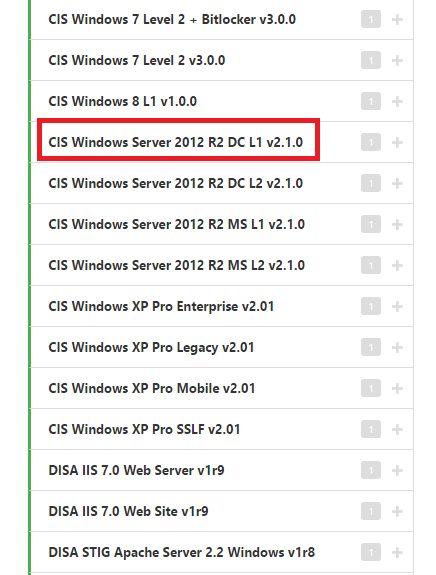
Now click on the Compliance tab and a list of benchmark templates will be visible on the left. The templates cover a number of operating systems and devices across a variety of architectures, however, we’re testing a Windows server so we’re clicking on Windows, which will spawn a further list of options. Scrolling down the list we find some options for Windows 2012 R2, shown in the picture below. The differences in scan are firstly either a ‘DC’ or ‘MS’ template, which stand for domain controller and member server, respectively, and ‘L1’ or ‘L2’, which are Level 1 and Level 2, respectively.
L1 scans identify configurations and settings that should be implemented on a system at a minimum, and shouldn’t disrupt services, whereas L2 scans are tighter lock downs for highly secure environments, often resulting in significantly reduced functionality. Our server is a DC so we’re selecting the highlighted CIS Windows Server 2012 R2 DC L1 v2.1.0 template.
This will populate some configurable options on the right of the screen, much like when selecting Windows credentials however, we can leave the defaults here. Finally as with our first scan, ensure the target Windows in-built firewall is turned off or configured so Nessus doesn’t have any trouble connecting. Start your scan!
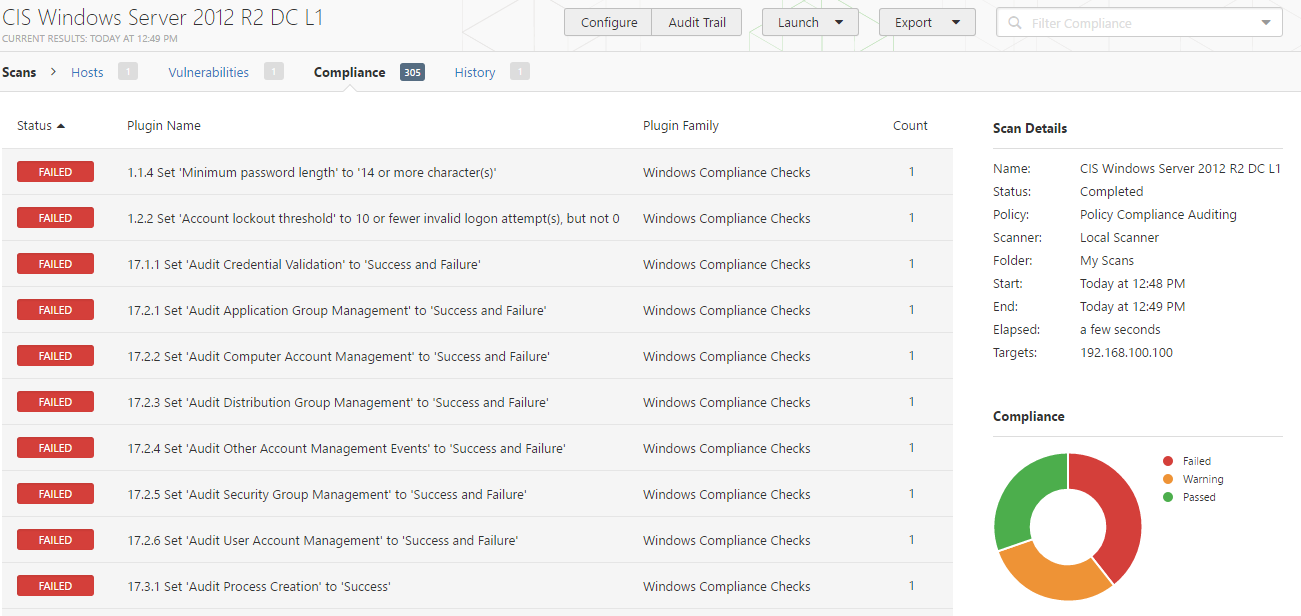
Results
Following the scan we can see a total of 305 compliance checks found, of which circa 40% had failed, 30% were warnings, and 30% were passes.
Final Thoughts
Although we covered a lot in this case, much of it was pre-scan prep work. This preparation needs to be carefully considered for two very important reasons. Firstly, if the configuration is incorrect it could stop Nessus from connecting all together and secondly because it could affect the completeness of the resulting report greatly.
Ensuring all bases have been covered will not only provide reassurance that you can continually rely on your tools to execute these audits but more importantly the actions taken (or if you’re missing issues, not taken!) as a result of the report could substantially affect the security posture of the system in question moving forward.
Whilst following a guide such as this to help you carry out your own vulnerability assessments can be relatively simple, understanding and interpreting the output in way that addresses your risks and challenges can sometimes be more complex. If you need to carry out assessments such as this and there’s anything you’d like clarification on, please don’t hesitate to contact us.
