In this tutorial we will show you how to configure Google Chrome to proxy through Burp Suite.
To allow easy configuration and management of proxies, we will be using the FoxyProxy add-on by FoxyProxy.
We will also make a separate Google Chrome profile for the proxy settings. This will allow us to keep our proxy configurations completely separate from our normal browsing profile.
Creating a Separate Profile in Chrome
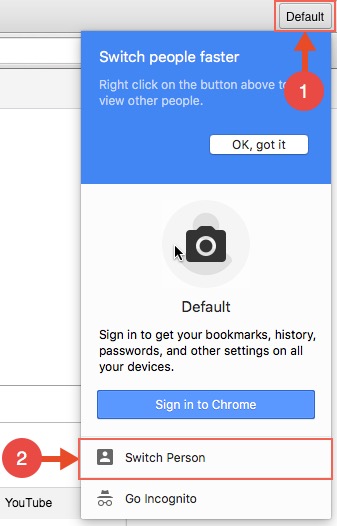
To create a new profile, click the button displaying your profile name and click switch person:
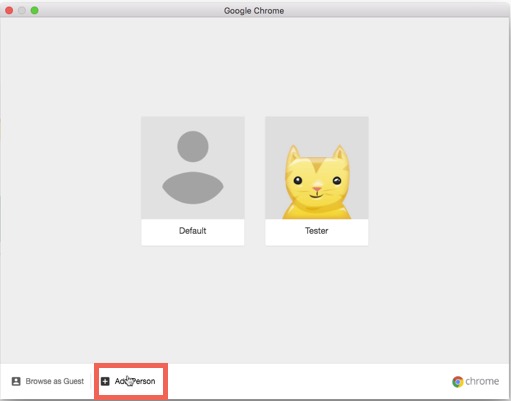
The following window will appear. From here click “Add Person”:
A Chrome window will then appear with the newly created profile.
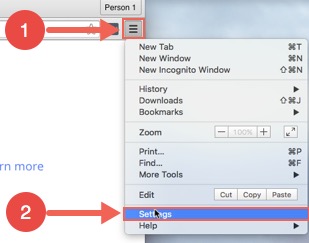
In the new window go to the settings:
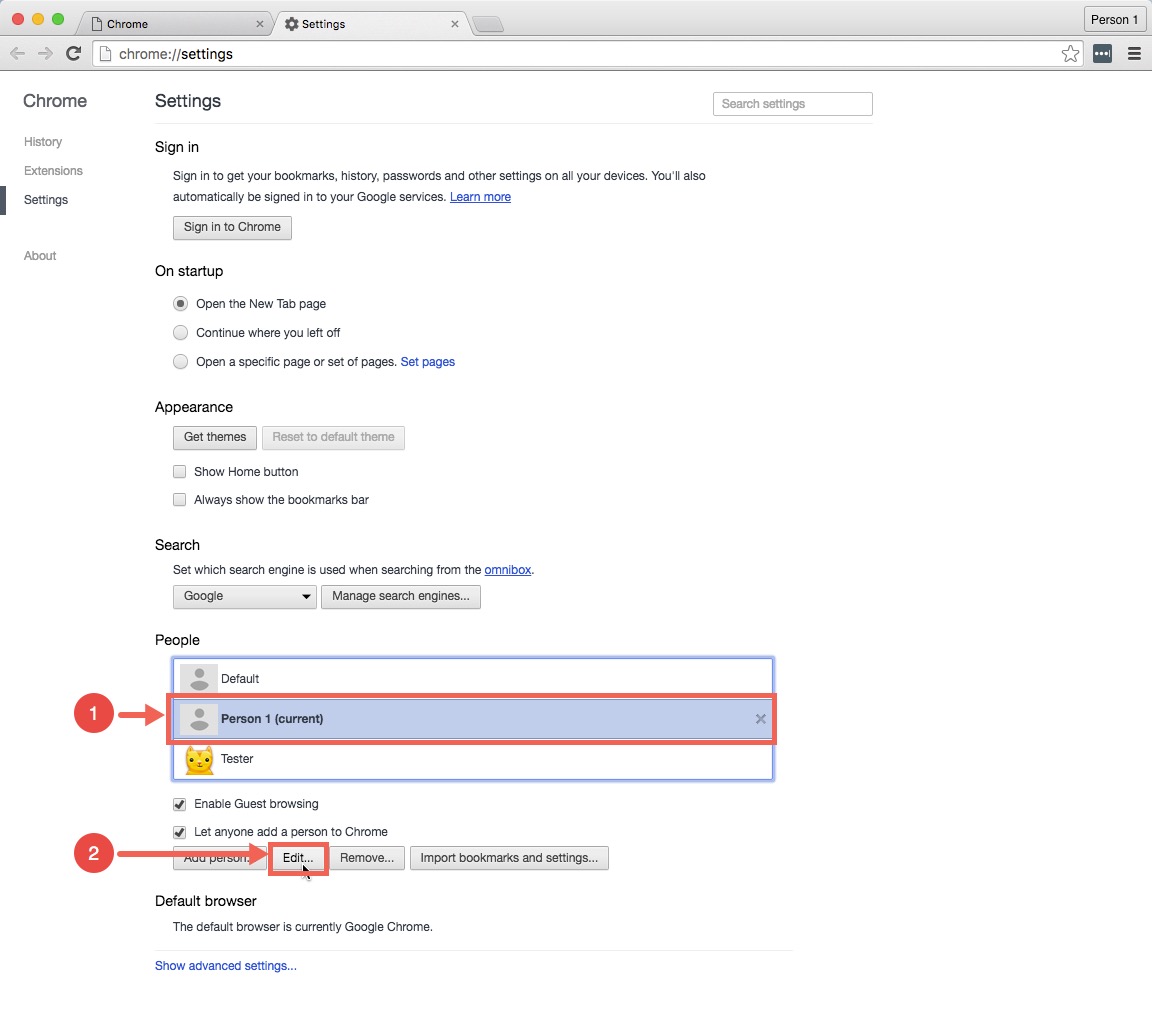
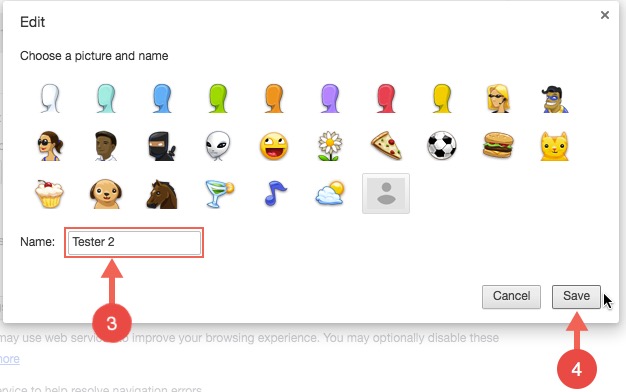
Here we will give the newly created profile a meaningful name.
You can edit the name like below:
Installing FoxyProxy
We will now install FoxyProxy on our new Chrome profile. This extension allows us to create profiles for different proxy connections and switch between them flexibly.
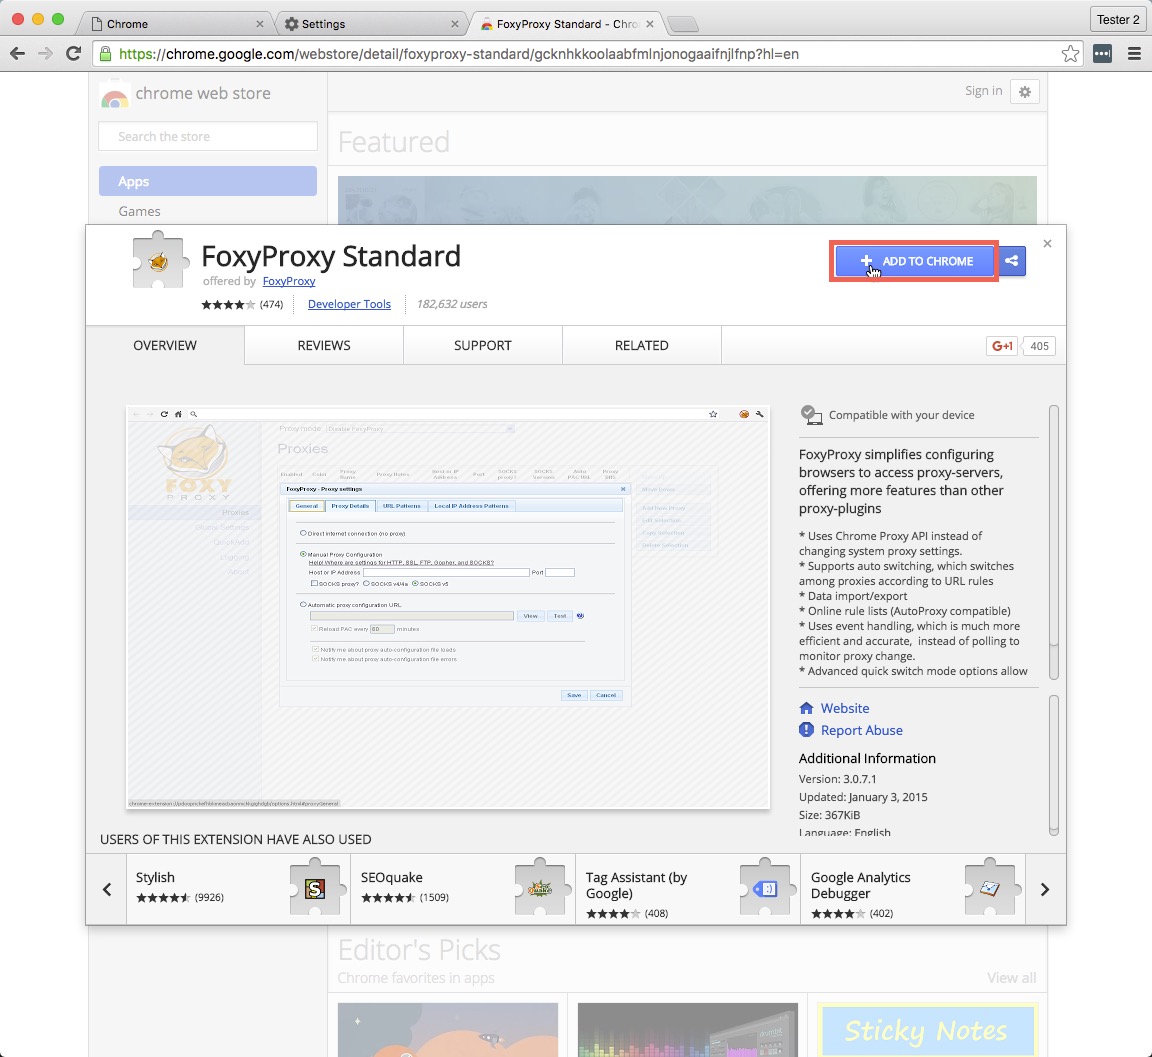
We can install FoxyProxy from the Chrome web store here.
On the FoxyProxy page , click the “ADD TO CHROME” button:
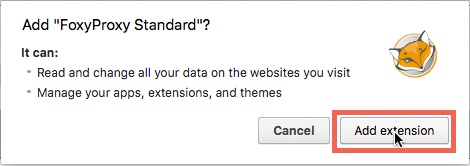
When prompted, click “Add extension”:
At this stage, you will have FoxyProxy installed on the new profile. It should be accessible from its icon to the left of the “Customise and control Google Chrome” button.
Configuring FoxyProxy to Proxy Through Burp Suite
We’ll now configure FoxyProxy to proxy through Burp Suite.
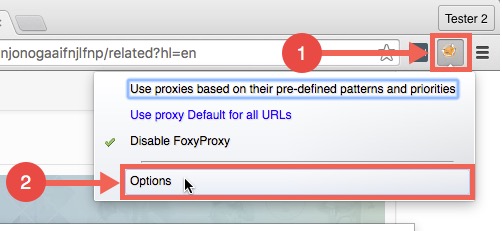
To start, click the options button that appears when you click the FoxyProxy icon:
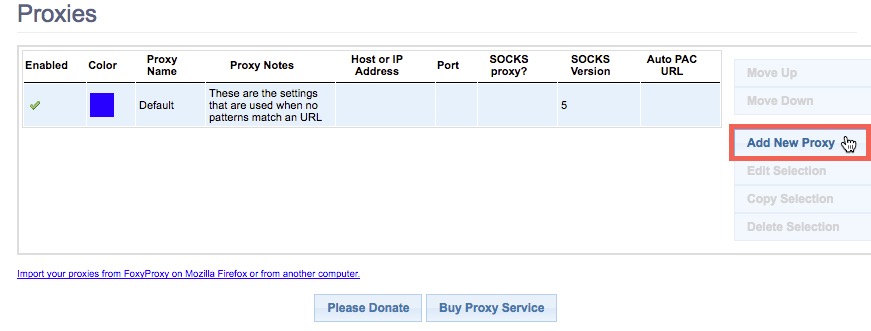
From the options page, click “Add New Proxy”:
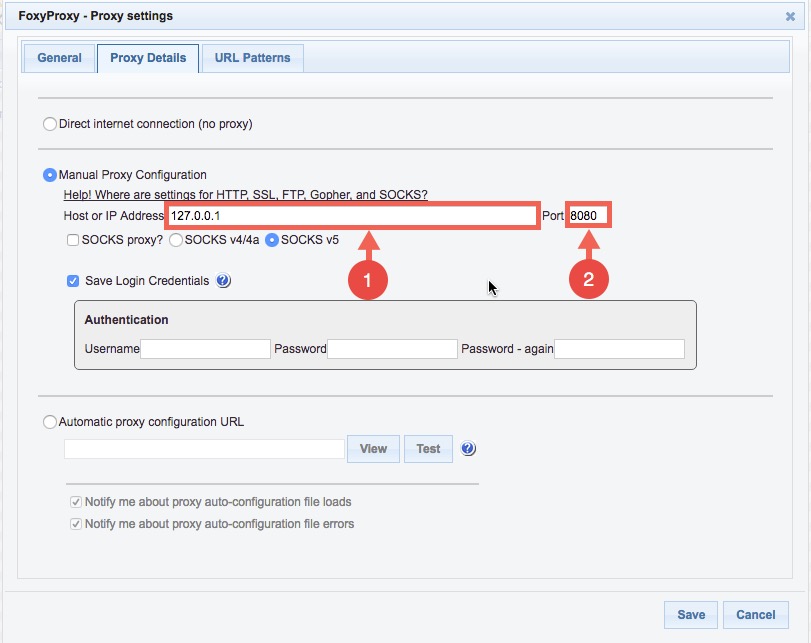
In the window that appears, we want to specify the IP address and port of where Burp is running. If Burp is running on your local machine, you can enter “127.0.0.1”. Otherwise, use the IP address of the machine which you will be running Burp from.
By default, Burp listens for requests on port 8080. If you have Burp configured to run on another port, you need to specify it here.
In my case, since Burp and Google Chrome are running on the same machine and Burp is listening on the default port 8080, I will use the following settings:
Once you have input the IP address and port number, switch to the general tab to give the proxy configuration a meaningful name and click save:
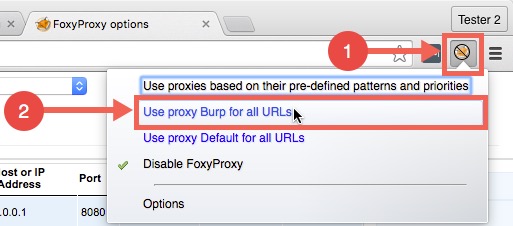
Now that we have a proxy profile configured, we can start using it by selecting it like below:
Viewing HTTP Traffic in Burp
At this point, we can now start Burp Suite and Chrome should proxy through Burp.
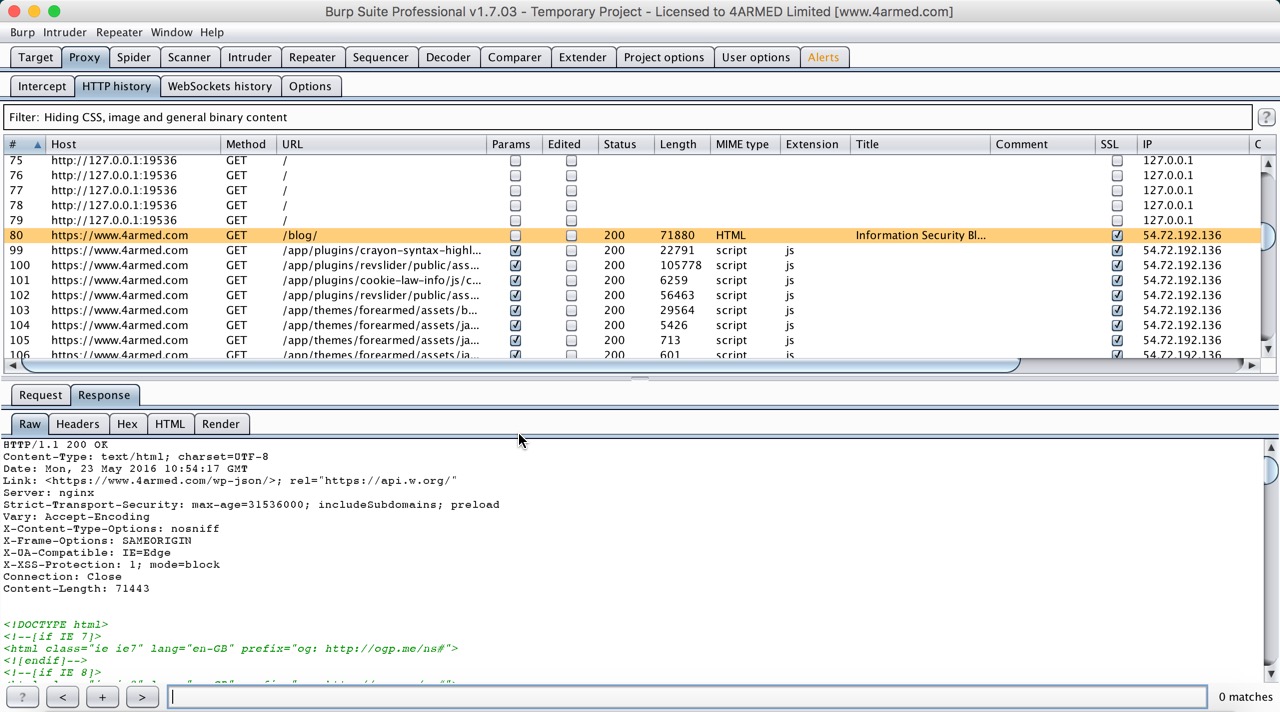
In the example below, you can see the requests and responses to and from the 4ARMED blog being logged by Burp Suite:
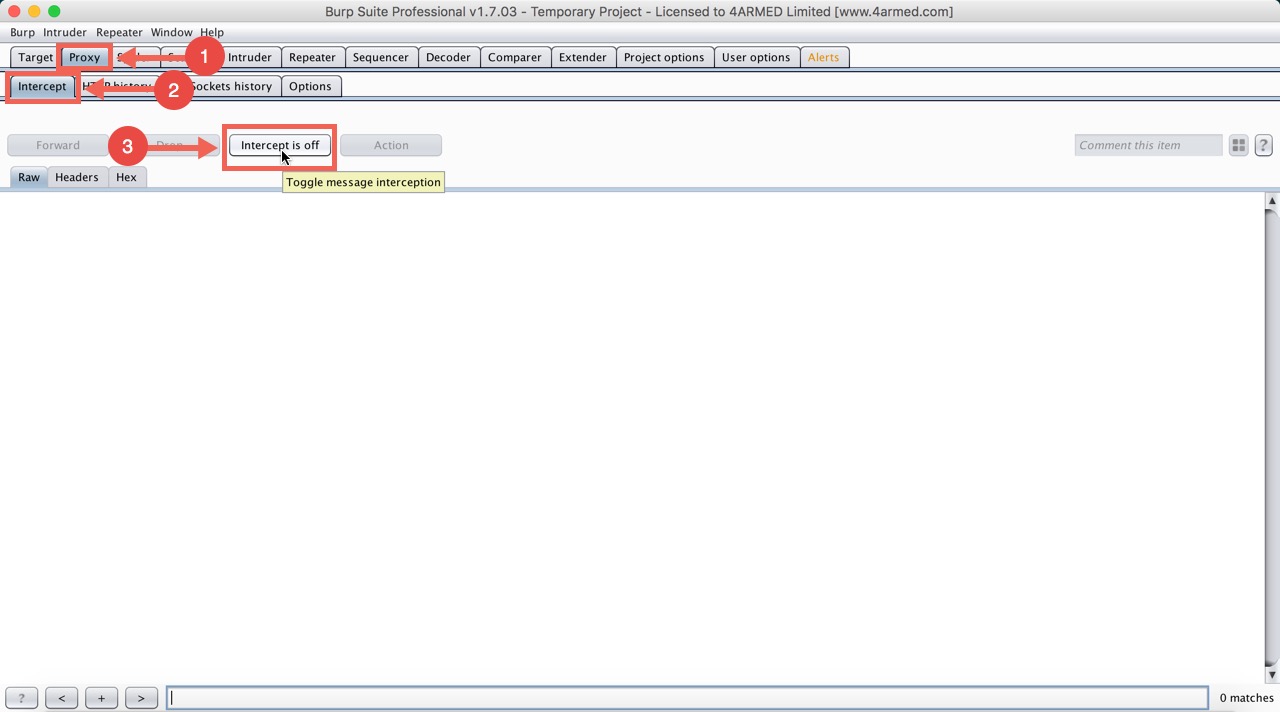
If your browser is hanging and you don’t see similar results in Burp like above, check that intercept mode is turned off in Burp like below and refresh the page:
Otherwise, make sure your proxy settings in FoxyProxy are correct.
Now you should be able to see all traffic that your browser sends and receives from within Burp Suite.
Switching Back to Normal Browsing
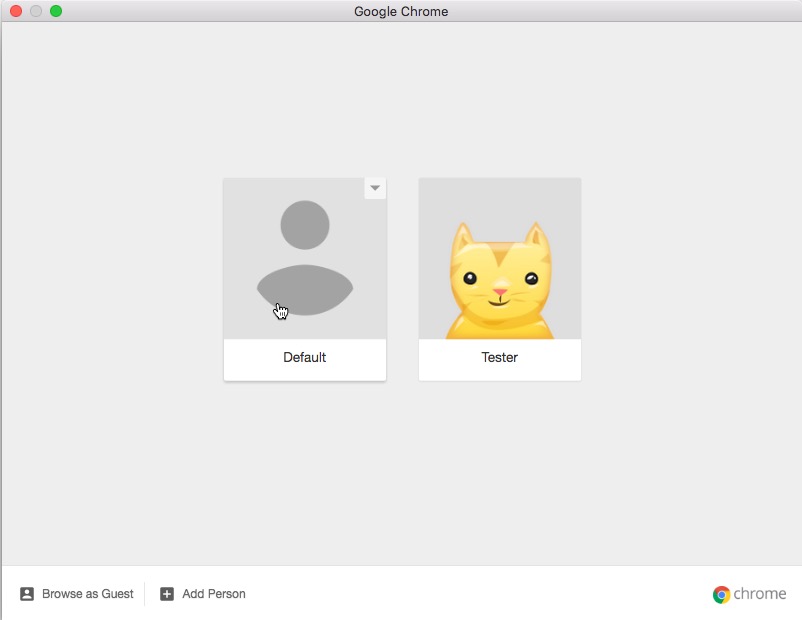
When you are finished using Burp Suite and want to use your browser normally, you can follow the steps below to switch from the profile we created, to your original profile:
In my case, my web browsing profile is the one named “Default” so I would select it:
Whenever you want your browser to proxy connections through Burp again, all you have to do is switch back to your newly named profile.
Summary
In this article we have shown you how Google Chrome can be configured to proxy through Burp Suite.
For ease of use, we created a new profile in Chrome to keep our normal browsing profile separate from our proxy profile.
For easy management, we made use of the FoxyProxy add-on to configure Chrome to proxy through Burp Suite.
